Whimsical No-Bake Dessert Cups
Highlighted under: Sugar & Spice Desserts
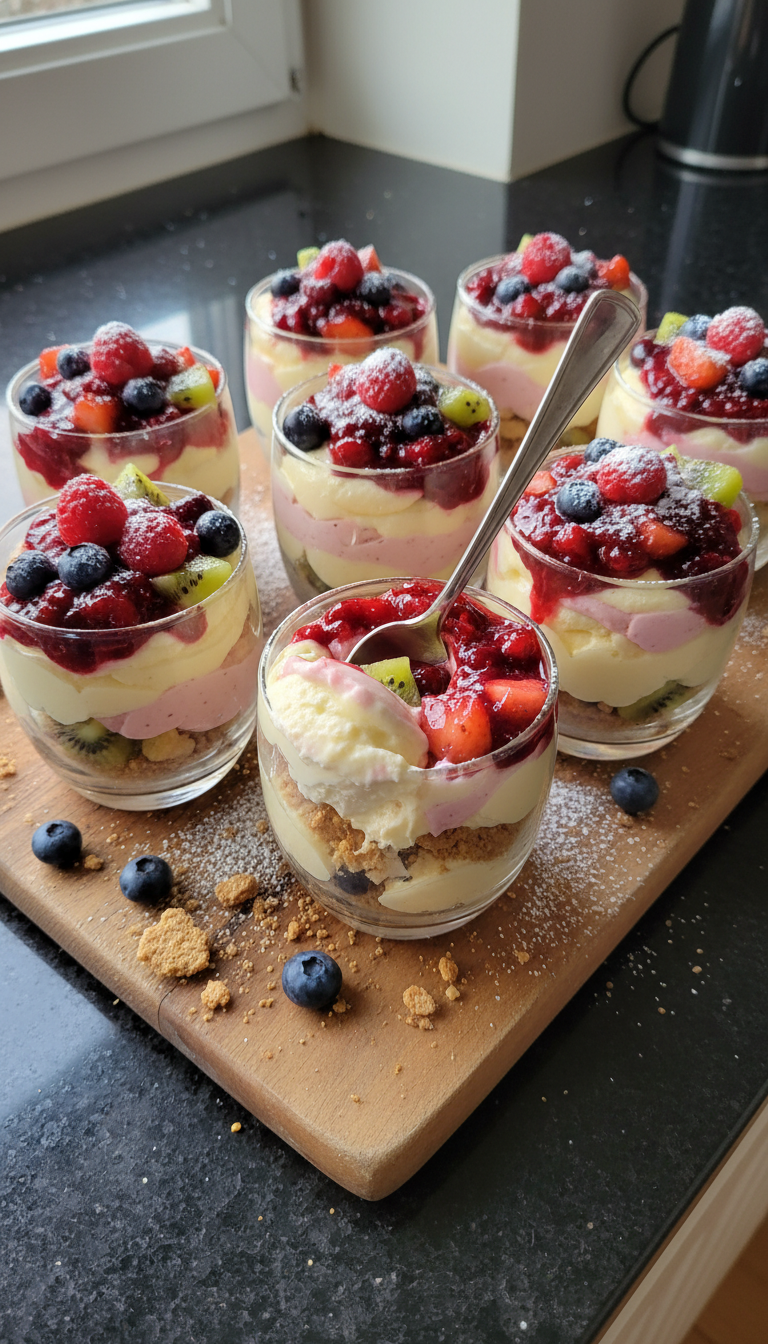
When I first created these whimsical no-bake dessert cups, I was looking for a fun and easy treat to brighten up my day. I love how versatile they are; you can mix and match flavors and toppings to suit your mood or the occasion. The best part is that they come together quickly, without needing to turn on the oven. With their delightful layers and colorful toppings, these cups are sure to impress guests and satisfy any sweet cravings!
Creating these no-bake dessert cups was a delightful journey filled with experimentation. I initially followed a traditional cheesecake recipe but decided to swap out traditional ingredients for a more playful twist. By layering a rich cream cheese base with colorful fruit toppings and a crunchy graham cracker layer, I was able to elevate a simple dessert into something whimsical.
I learned that the key to achieving the perfect texture lies in allowing the cream cheese to soften at room temperature before mixing, which makes for a smoother, creamier filling. The fun part is definitely in the assembly—let your creativity shine with the toppings and see how it brings everyone together at the table!
Why You Will Love This Recipe
- Fun, colorful presentation perfect for any occasion
- No baking required, making it a quick and easy treat
- Versatile layers that allow for endless flavor combinations
Creating Your Base
The base of these whimsical dessert cups plays a crucial role in providing a crunchy texture that contrasts beautifully with the creamy filling. Using graham cracker crumbs is traditional, but you can experiment with other cookies like Oreo or digestive biscuits for a different flavor profile. When mixing the crumbs with melted butter, ensure the mixture resembles damp sand; this will help achieve a firm structure when pressed into the cups. Aim for an even layer to support the filling and toppings effectively.
Pressing the graham cracker mixture into the bottom of your dessert cups should take only a couple of minutes. Use the back of a measuring cup or your fingers to ensure it's compact. If you're preparing this ahead of time, you can store the cups at this stage covered in the refrigerator for up to two days, allowing for convenience when you're ready to add the filling and toppings.
Perfecting Your Filling
The cream cheese filling is where the magic happens. It’s essential to beat the softened cream cheese thoroughly until it is completely smooth before adding powdered sugar. This prevents lumps, ensuring a silky texture throughout your dessert cups. I recommend using an electric mixer for about 2-3 minutes on medium speed to achieve the right consistency. If you don't have cream cheese, mascarpone or thick Greek yogurt can be used as alternatives, though this may subtly change the final flavor.
When folding in the whipped cream, take care not to deflate it by using a spatula and a gentle folding motion. The goal is to keep as much air in the mixture as possible, which contributes to a light and airy texture. If done correctly, the filling will be glossy and hold its shape. This step only takes about 1–2 minutes of careful mixing, but it’s key to achieving the delightful mouthfeel of the dessert.
Serving and Storing Tips
After layering the filling and toppings, refrigerate the cups for at least 30 minutes. This chilling time allows the flavors to meld and helps the filling set properly. If you prefer a firmer texture, consider chilling them for up to 2 hours. These dessert cups can be made up to a day in advance, making them an excellent choice for gatherings. Just be cautious with toppings like berries, which can become soggy over time; add them right before serving for the freshest taste.
For variation, feel free to substitute the mixed berries with other fruits like diced peaches or bananas, or even add a layer of chocolate ganache beneath the berries for a rich twist. If you want to scale this recipe, maintaining the ratio of base, filling, and toppings will ensure consistent results, making it easy to create larger batches for parties or events.
Ingredients
Ingredients
For the Base
- 1 cup graham cracker crumbs
- 1/4 cup unsalted butter, melted
- 2 tablespoons sugar
For the Filling
- 8 oz cream cheese, softened
- 1/2 cup powdered sugar
- 1 teaspoon vanilla extract
- 1 cup whipped cream
For the Topping
- 1 cup mixed berries (strawberries, blueberries, raspberries)
- Chocolate sprinkles (optional)
- Mint leaves for garnish (optional)
Mix the ingredients according to your desired flavor combinations.
Instructions
Instructions
Prepare the Base
In a bowl, combine the graham cracker crumbs, melted butter, and sugar. Mix well until the crumbs are moistened. Portion the mixture into the bottom of four dessert cups, pressing it down gently to form an even layer.
Make the Filling
In a medium bowl, beat the softened cream cheese, powdered sugar, and vanilla extract until smooth. Gently fold in the whipped cream until fully incorporated.
Layer the Dessert
Spoon the cream cheese mixture over the graham cracker base in each cup. Make sure to leave a little space for the toppings.
Add the Toppings
Top each dessert cup with the mixed berries. You can arrange them artistically for a charming touch.
Chill and Serve
Refrigerate the dessert cups for at least 30 minutes before serving. Garnish with chocolate sprinkles and mint leaves if desired.
Serve these delicious no-bake dessert cups at your next gathering!
Pro Tips
- Experiment with different fruit toppings such as sliced bananas, peaches, or even a drizzle of caramel for added flavor.
Flavor Combinations
One of the most delightful aspects of these no-bake dessert cups is the freedom to experiment with flavors. For a chocolatey twist, you can use chocolate pudding instead of cream cheese filling. Just ensure it is thick enough to layer. Alternatively, try infusing the cream cheese filling with flavors like lemon zest or almond extract—a little goes a long way in brightening up the taste.
Consider using flavored whipped cream or a layer of mousse on top to add complexity. Raspberry sauce or a chocolate drizzle can also complement the berries beautifully, enhancing the overall presentation and flavor profile. The layering possibilities are endless, making it easy to customize for your preferences or seasonal ingredients.
Garnishing Your Dessert Cups
Presentation is key with these whimsical dessert cups. To elevate their visual appeal, stack various berries in a way that showcases their vibrant colors. This not only pleases the eye but invites guests to dig into the layers. Adding a sprinkle of chocolate sprinkles can introduce a fun texture, while fresh mint leaves provide a popping contrast of color as well as a refreshing aroma.
If you're feeling extra creative, consider using edible flowers as a garnish or serving the cups on decorative platters with added elements like crushed nuts or coconut flakes around them. This creates an upscale feel for casual gatherings while keeping the overall effort minimal.
Questions About Recipes
→ Can I make these cups in advance?
Yes! You can assemble the dessert cups a day ahead and store them in the refrigerator until serving.
→ Can I use a dairy-free cream cheese alternative?
Absolutely! Substitute with any dairy-free cream cheese to make it suitable for dietary preferences.
→ What can I replace graham crackers with?
You can try using digestive biscuits, crushed cookies, or even granola for a different flavor profile.
→ How long do these dessert cups last in the fridge?
They can be stored in the refrigerator for up to three days, although they are best enjoyed fresh.
Whimsical No-Bake Dessert Cups
Created by: The Cheflinaskitchen Team
Recipe Type: Sugar & Spice Desserts
Skill Level: Beginner
Final Quantity: 4 cups
What You'll Need
For the Base
- 1 cup graham cracker crumbs
- 1/4 cup unsalted butter, melted
- 2 tablespoons sugar
For the Filling
- 8 oz cream cheese, softened
- 1/2 cup powdered sugar
- 1 teaspoon vanilla extract
- 1 cup whipped cream
For the Topping
- 1 cup mixed berries (strawberries, blueberries, raspberries)
- Chocolate sprinkles (optional)
- Mint leaves for garnish (optional)
How-To Steps
In a bowl, combine the graham cracker crumbs, melted butter, and sugar. Mix well until the crumbs are moistened. Portion the mixture into the bottom of four dessert cups, pressing it down gently to form an even layer.
In a medium bowl, beat the softened cream cheese, powdered sugar, and vanilla extract until smooth. Gently fold in the whipped cream until fully incorporated.
Spoon the cream cheese mixture over the graham cracker base in each cup. Make sure to leave a little space for the toppings.
Top each dessert cup with the mixed berries. You can arrange them artistically for a charming touch.
Refrigerate the dessert cups for at least 30 minutes before serving. Garnish with chocolate sprinkles and mint leaves if desired.
Extra Tips
- Experiment with different fruit toppings such as sliced bananas, peaches, or even a drizzle of caramel for added flavor.
Nutritional Breakdown (Per Serving)
- Calories: 230 kcal
- Total Fat: 14g
- Saturated Fat: 8g
- Cholesterol: 40mg
- Sodium: 130mg
- Total Carbohydrates: 24g
- Dietary Fiber: 1g
- Sugars: 12g
- Protein: 3g